Wednesday, December 3, 2014

Winter Project Season Has Begun

Winter has finally showed its face, and with it comes projects and much needed service/maintenance. On the last day of putting our covers down we were welcomed with 3-4 in of snow that blanketed the entire course. But the snow melted in two days with temps in the 50's. Though I would of like to see it stick around, I did have some winterization tasks to complete first.      

#8 Fairway 

Back ridge of #8 green 


 I did have an inclination that I wasn't going to get all my snow fence done before it did snow in the beginning of November. Luckily I did spray all the greens and tees before the snowfall. The picture below was literally two days before it snowed when I was spraying with about 1 mi/hr winds at about 6 pm. I did manage to finish the greens just before dark. The tees on the other hand, were finished under the lights of the sprayer and the moon.   

#3 green just before sunset

#18 green facing east 

Since it did snow on the last day of covers. I did have to complete the last cover by myself after all the snow melted. The crew handled the wind and the covers like pros before the snow. We put all the covers but one down in about 12 hrs. But I think the last one took myself hour and a half to with no wind. So these guys were truly a huge help.

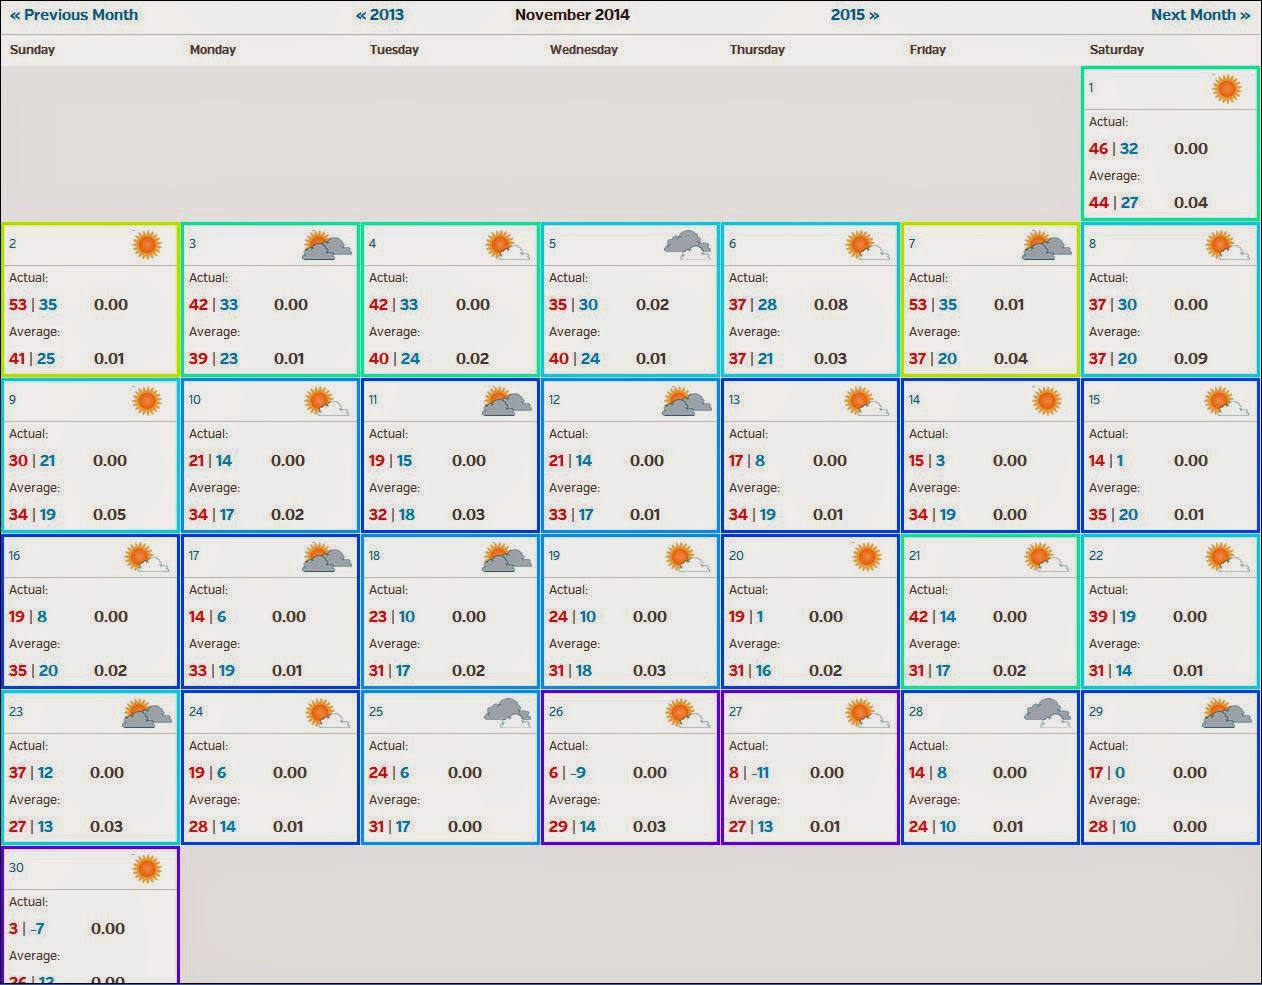
Before we put all the covers on we did manage to tackle some projects, and completed before mother nature furnace shut off. The weather around this area as much of the US went from 50 and 40 degree highs to below freezing and negative temps right around the second week of November. 

We really only had one nice week to work without a jacket on. 

#2 green and rough surround

It looks like we may have installed new irrigation around some tees and greens, but I decided that some areas needed to be root pruned. There were a couple tees and one green that were struggling this year. And after some consideration I decided to prune the areas where there are trees within 20 feet of critical playing surfaces. When the temps get pretty I high, and the humidity is pretty low. I found these are struggle the most. 


Feeder roots within 6 feet of #2 

The roots varied in size from the thin ones that are pretty prevalent here, to the thicker ones in the fore ground. I actually had to break out the ole hand saw to cut a couple that were around an inch thick. We then placed tar paper like a taco in the trench and back filled into the tar paper. Its pretty labor intensive trying to keep the paper in the right spot, but I'm sure it will be worth it in the end. In one location I have already noticed the difference. Thanks to the help of a Bobcat 650 with a trencher attachment and the crew we finished this job in just one day. 

Flagpole area.

Shop wash pad  

Drainage that flows away from the shop to prevent pooling and a mess in front of it.  

The whole summer we had to wash off all the equipment in mud and old grass clippings. So I dedicated an area to wash of everything, and to build a chemical storage addition. The project really took more prep work then labor to pour the slab, I can truly say that this should of been done a LONG time ago. In all it took two days to pour and a couple days of prep including running a drain, landscaping, and framing. We also poured a pad in front of the flag poles to make a better transition to the main cart path. 

Parking lot fence before cleaning 

After cleaning 
I also thought our two year old fence looked a little tired and in need of a touch up. I first though I could just stain the fence. That was a bad decision! I went and snatched the pressure washer from the shop. Blasted a layer of junk off the fence, and here is the result. Pretty night and day. I guess the stain wasn't included in the quote of the fence at the time it was erected. I then took the washer to the whole thing that same night. We came out the next day after it dried, and put a good coat of stain/sealer on to it.


The final project before greens covering was to pull off the cover on my newly seeded blue tee on 18. I seeded this tee back in the end of August. I threw a bunch of seed two ways with the Landpride overseeder, and spread some seed over the top with an application of fertilizer. I believe this picture was taken right before Halloween. With the completion of this tee the course is 100 percent grown in and ready for golf. 

As this season closed I looked back and realized I have come a long way in gaining a knowledge how to truly run this course. With all the long hours and labor it has payed of with dividends. Now I am transitioning into winter projects to service all the equipment, and start some course accessory updates to increase playability/aesthetics of the course.   


Wednesday, July 23, 2014

Never a Dull Moment

I haven't posted anything for quite awhile, meaning I was on the busy side the last two months with irrigation, course, infrastructure renovations.  In the beginning of June into July we had a decent amount of precipitation allowing us not to irrigate as much, but as soon as I got back from my summer vacation. Mother nature turned on the furnace and dehumidifier at the same time. These dry conditions started to take a toll on our irrigation system and exposed all of our faults.


After diving into my pump station early this spring I nearly tripped over all the stuff inside because the past person taking care of the place had no regard for anything in the the shed. After cleaning I came across a giant crack in my jockey pump case. Again after fall blowout no one drained the pumps. $500 later I then had ONE working pump that flows approximately 200 gallons per minute. While I was waiting for parts for the jockey pump I had to use my other pump that is supposed to flow close to 500 gal/min at 100 psi. As I turned it on for the first time it only pushed 100 gal/min at 100 psi creating a interesting time trying to irrigate anything. Luckily enough we had perfect timing of rainfall and mild temperatures to help out with stress on the course.  


Above I had taken apart my pump after I had fixed my smaller jockey pump to figure out why my 40hp electric pump was flowing such a low amount of gal/min. Below is what I immediately found. 


It's almost frustrating to find stuff like this but a relief also, in the past no one has checked the screens on any of the pumps, and a large hole had developed on the bottom of the screen letting large particles (Rocks) enter into the pump clogging and damaging the vanes of the pump impeller. So after a quick call and $1100 later my primary pump is back to full capacity flowing close to 550 gal/min. Giving me a total of 750 gal/min though I'll never want to pump that crazy at least I can rest at night that all is good when I irrigate overnight.   
.


After priming my irrigation system early in the year we came across a section that didn't get blown out properly, because someone shut off a valve in a low collection point. Causing the PVC to spiderweb and break. The total length of the break was around 100 feet. I have used a lot of machinery but never a backhoe. I am so thankful that one of our members is the store manager of Bobcat of Devils Lake. They let us use one for a couple of our projects and this saved me about 10 hours of pain staking digging in thick humic clay. I hate to admit it, but I had so much fun using that piece of equipment. I didn't want to give it back.

 
In early May I had blogged that we had a severe washout that took out the crossing from hole four to five tee. We had to haul around twenty yards of new, dry fill to put over the new 18 in drainage provided by Advanced Drainage Systems. I took a little redneck engineering on my part to fit the dam box on the new drainage. I used a a good section of the old culvert, and it fit perfectly over the poly culvert. Then connected it with the rubber seal we already had, so it with be water tight to prevent a washout again.    
culvert installation 

fill added in levels and repacked each time

almost done 

Finished product before cart path material was added. We also added bigger rock to help with stabilization.


The installers that put all the irrigation in back in the early 90's had put valve boxes around all the valves but not the quick couplers. If you don't know what a quick coupler is its just a quick access point to the irrigation to usually around a green to aid in hand watering greens. So I had my guys reset the couplers and put in valve boxes over them to protect my mowers from damaging the reels. The couplers in some spots were protruding out the surface about an inch. It may not seem like a lot but we mow our collars and fairways at a 0.500 of an inch and this was causing the reel of our mower to hit the top of the couplers. The installers in the past had even made the job more difficult by setting them in concrete. They even got so lazy they left the forms in the ground.    


After all my problems were solved with the irrigation I decided to tackle my bunker renovation that the past superintendents deemed unattainable. They left this bunker as ground under repair for the past five years.
So I'm beginning to see a trend now and I'm sure you are too. Lazy + Inexperience = Catastrophic Failure.
in the above picture I had hauled out around 50 cubic yards full of junk sand and clay mix. And thanks to the new construction of Decorated Wearables and Mike Yoder. I hauled in around 200 more yards of fresh dry fill to raise the bottom of the bunker and create a perfect slope for the water to drain with. Before the water was pooling at the bottom of the bunker/overgrown ugly hazard. Now after an inch of rain it dry and free of any water.


The previous area where the newly renovated bunker is, was always full of water around the green complex. For the past month or so I could not figure out why. With some troubleshooting I found that when I would turn on any heads in same satellite box, four or five heads would repeatedly turn on an off like a whack-a-mole machine. So I went straight to the source and looked at the circuit boards that control the heads and the above is what I found. Three of the six boards that control the irrigation heads were shorting out causing random heads to pop up. I also found out from an employee that the old mechanic was trying to recondition these same boards by re-soldering them and trying to make them work. I replaced these the same day any everything was back to normal. Each one of these boards costs around $250.  


The past week I had a good experience with water management because the one and only well company in town has been so busy, he couldn't make his way out here to help hook up the pond fill line. The past two weeks I could't irrigate my fairways because we had no water to pump. We do have a natural spring that flows water from the adjacent lake but without a pump it only flows around 50 gal/min. On a heavy irrigation program we flow right around 320,000 gallons in one night. One might think why cant you just turn it on well it needs to be plugged down six feet to stay below the frost line. So every year it needs to be raised six feet to take off the plug and hooked up to the fill line. Oh ya I forgot to mention that the whole thing weighs approximately 1300 lbs because it goes down 160 feet in the ground attached with three inch steel pipe. But at full capacity it pushes 350 gal/min and filled our pond in five days.    


While I was driving around the course this morning checking to see if we had any irrigation issues the night before. I noticed a really dry patch that maybe looked like an insect problem. I stuck a shovel in the ground and hit something solid turned out to be this beautiful boulder. It took about an hour to dig around enough to get some chains on, and yank her out of the ground. This is why I love my job! Every day out here holds something new and exciting that it decides to shove in my face!   


Thursday, April 17, 2014

April Showers?

As we had around a foot of snow in the end of March it made for a interesting spring melt. I have been venturing out around the course in the last couple of weeks keeping a curious eye on tee boxes, greens, and drainage collection areas I had found that due to efforts of spraying fungicides and fall cleanup efforts damage was very minimal. Mostly abiotic stresses have occurred leaving lots of water in catch basin areas and large areas. Due to the depth of the frost all the drainage around the course was frozen.
Flooded drainage catch basin on right green side bunker area of 4. 

Drainage line between 4 green and the start of 5 fairway that feeds into the main drainage ditch.

Last frozen section of drainage to thaw closest to the tee on 15.  

With our cool weather in March and beginning of April we had a little Pink Snow Mold pop up on 9 green. We had a little snow cover that extended into march and prolonged cool and wet days that gave the disease the perfect environment to harbor this fungus. But with our 60 degree temps the disease symptoms slowly
faded away with the warm temps.

Close up of the front left part of 9 green.

Larger view of the lighter but larger affected areas.

Any holes that were significantly covered with snow also suffered from Snow Mold, unlike Pink Snow Mold the Grey Snow Mold on the fairways needs snow cover to develop symptoms. Just about every hole that has trees protecting them in the winter was affected. With a little bit of TLC these areas should bounce right back. The rough has not really been affected at all by the damage, and the disease symptoms were mainly confined to the fairways. 

#2 Approach riddled with a little bit of Vole and Grey Snow Mold damage.

View from #2 green looking at the approach. 

As we all make mistakes in our careers we sometimes forget to do things or make errors time to time. But here is a perfect example of what some people would think is disease. I fact the applicator forgot a pass or forgot to turn on the boom. So symptoms from Grey Snow Mold appeared from the lack of protection.
  
#6 Par 3 men's tee.

I guess around ten to fifteen years ago the club went through a little bit of a remodel updating some holes and irrigation. But to save money they literally cut corners to save on pipe. Instead of running the main line twenty yards to the nearest crossing they just went across the drainage ditch. They get an A for effort on the use of HDPE pipe, but poor execution on follow through. Now the wire that runs along pipe has broken causing the heads not to pop up.    
  

On a Brighter note as I said before I went around the course peeking under the covers, and what I found was very comforting. The greens are starting to green up relatively nice for the cool dry weather we've had so far.  
Underneath #6 green's cover. 
Number five looks the best out of all the uncovered greens with nice color and no symptoms of disease or stress.
#5 green 

So with any little bit of luck we can start golfing in two weeks and have nice weather in the 60's to 70's. But don't be shocked to see a little shot of snow in may. Just be thankful we don't have to deal with the weather they had south of us on Wednesday, April 16th.